Documentation and online training
Language
Install
Tutorials
Advanced tutorials
Need help ?
Presentation of software
In this chapter, we are going to discover the functionality of e-Plans.
First of all, when you will have ended the installation of e-Plans, you will see an abbreviated on your office.
![]()
The first time you will launch software, you will be asked to create a project,(in the next part, we will see how to create a project in e-Plans).If you have already created a project, you will be asked to open an existing project.
Toolbars

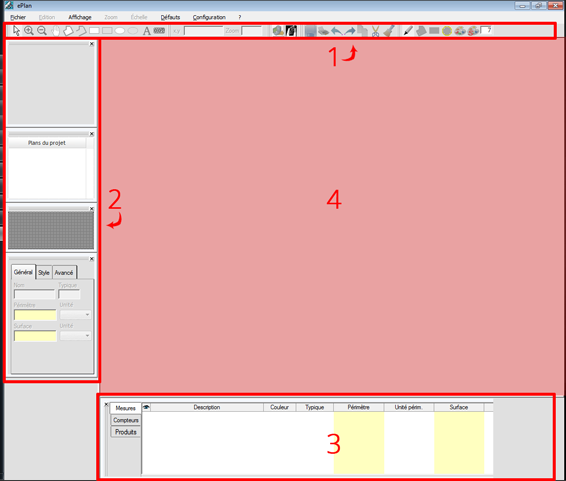
- This zone provides quick access to the most used tools such as measuring tools.
- The left panel offers several toolboxes, in the following order.
- The navigator ; Shows an outline of the plan on which we are currently working.
- The plans of the project ; Allows to navigate between the plans of the same project.
- The magnifier ; Allows to see extends (zoom) the area over which you fly with your mouse on the plan. To change the zoom level, put your cursor over the window and use your mouse wheel.
- The windows of properties ; When you select an item, you will be able to change general properties, style and advanced properties.
- The bottom panel allows you to manage all measurements, your meters and your products.
- The rest of the space that is not occupied in the center is your workspace. This is where you will take your measurements.
The contextual menu
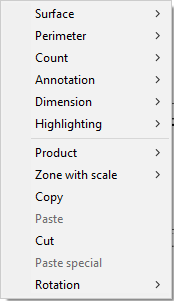
When you click (on the right button of the mouse),on a map of the work area, a menu is displayed. This menu offers you all the options you will need with e-Plans.
Note: The menu is contextual and therefore only the options available to you will be displayed.


